The Ultimate Guide On How To Grow Microgreens at Home: Step-by-Step Instructions
Introduction
Wondering what those small green leaves are in your salad bowl at restaurants? Those are microgreens! They look fancy but trust me, growing them at home is super easy. More and more people are starting to grow these tiny plants in their homes these days, and it makes total sense.
Let me tell you something interesting – these small plants are selling like crazy in the market now. If you check any vegetable shop or supermarket, they’re charging 400-500 rupees for just one tiny box. Total waste of money! That’s why I started growing them at home, and honestly, it’s so much better.
Growing microgreens at home is really simple. Just need some seeds, a container, and basic stuff from your local garden shop. No gardening experience needed at all. My friend started growing them in his small apartment balcony, and now he’s got a great setup. Even my neighbor’s kids help their mom grow these plants – it’s that easy!
If you’re thinking about how to grow microgreens at home, this guide will help you get started. Everything is explained based on what actually works. No complicated stuff, just simple steps that anyone can follow. I’ve talked to many people who grow microgreens, and they’ve shared lots of useful tips which I’ve included here.
The best thing? These plants grow super fast – you can see results in just 7-14 days. And they taste much better than those expensive ones from the market. Plus, they’re totally fresh and healthy. Once you start growing them, you’ll wonder why you didn’t try this earlier.
This guide covers everything – from buying the right seeds to harvesting your plants. All steps are explained in a simple way, with real tips that work. So let’s get started with growing these amazing plants at home!
What Are Microgreens?
Many people get confused between microgreens, sprouts, and baby greens. Let me explain in a simple way. Microgreens are basically very young vegetable plants that are harvested when they’re just 1-3 inches tall. They’re like teenage plants – not as small as sprouts but not as big as baby greens.
The main difference is in how we grow and eat them. Sprouts are grown in water and we eat the whole thing – seed, root, and shoot. Baby greens are like regular plants but harvested when very young. But microgreens? We grow them in soil or similar growing material, and only eat the stem and leaves after they’ve grown their first set of real leaves.
There are so many types of microgreens you can grow at home. Some really common ones are:
- Mustard (gives a nice spicy kick to your food)
- Radish (ready super quick, in just 5-7 days)
- Sunflower (really crunchy and tasty)
- Pea shoots (sweet and perfect for salads)
- Beetroot (beautiful red stems that look great in food)
The best part about microgreens is that they’re packed with good stuff for your health. Research shows they have 4-40 times more nutrients than their fully grown versions. Imagine getting the goodness of a whole plate of spinach from just a small handful of microgreen leaves! They’re full of vitamins, minerals, and antioxidants that help keep you healthy.
These tiny plants also add amazing flavors to your food. Some are spicy, some are sweet, and others have interesting tastes that make regular dishes more exciting. That’s why many home cooks are now growing different types of microgreens – they’re like having a box of natural food flavors right in your kitchen!
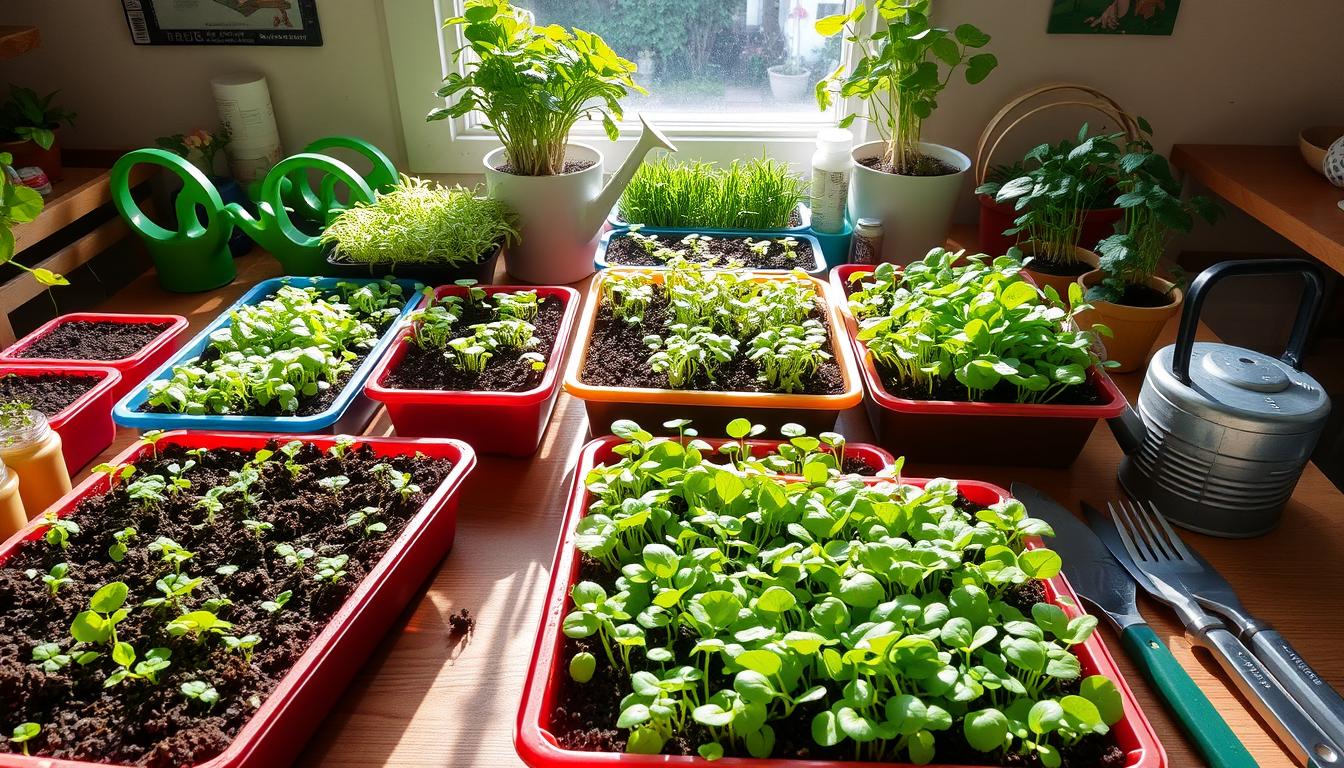
Essential Equipment and Supplies
Let’s talk about what you actually need to start growing microgreens at home. Don’t worry – you won’t need to buy expensive equipment. Most things are easily available in local shops or online.
Growing Containers
You don’t need fancy trays to get started. Any shallow container with drainage holes works fine. Many people use:
- Plastic boxes from old takeaway food
- Regular plastic growing trays (around 100-150 rupees each)
- Old plastic fruit boxes with holes made at the bottom
- Small aluminum trays (make sure to add drainage holes)
Just make sure your container is at least 1.5-2 inches deep. Keep a second tray without holes to put underneath for catching water.
(Know more about Best Microgreens Trays.)
Growing Medium
For the soil part, you have several good options:
- Regular potting mix (cheapest and works well)
- Coco peat (very popular and easy to use)
- Special microgreen mix (bit expensive but good results)
Avoid using garden soil as it might have insects or diseases. A good 5kg bag of potting mix costs around 200-300 rupees and lasts for many grows.
(Know more about Growing Medium.)
Seeds
This is one thing where you shouldn’t try to save money. Always buy good quality seeds meant for growing microgreens. Local nursery seeds might be cheaper but often don’t grow well. Expect to spend:
- Small packets (50g): 100-150 rupees
- Larger packets (250g): 400-600 rupees
(Know more about Best Microgreens Seeds)
Lighting
For lighting, you have two choices:
- Natural sunlight (totally free!) – just need a sunny window or balcony
- LED grow lights – get these only if you don’t have good natural light
(Know more about Grow Lights)
Basic Tools You’ll Need
- Spray bottle for watering (30-50 rupees)
- Small scissors for harvesting (already in most homes)
- Measuring spoons (use kitchen spoons)
- Old newspaper for cleaning
Startup Costs Table
Here’s a simple breakdown of what you’ll spend to start:
| Item | Cost (Rupees) | Notes |
| Growing Trays (2 sets) | 300-400 | One with holes, one without |
| Potting Mix (5kg) | 200-300 | Enough for multiple grows |
| Seeds (3 types) | 400-500 | Start with easy varieties |
| Spray Bottle | 50 | Any plastic bottle works |
| Basic Tools | 100-200 | Most are already at home |
| Total | 1050-1450 | One-time setup cost |
Remember, most of these are one-time investments. After the initial setup, you’ll mainly need to buy seeds and growing medium. That’s why growing microgreens at home saves money in the long run – one box from the market costs as much as your entire setup!
Step-by-Step Growing Process
Now comes the fun part – actually growing your microgreens! I’ll break down each step so it’s super easy to follow. Even if you’ve never grown anything before, you can definitely do this.
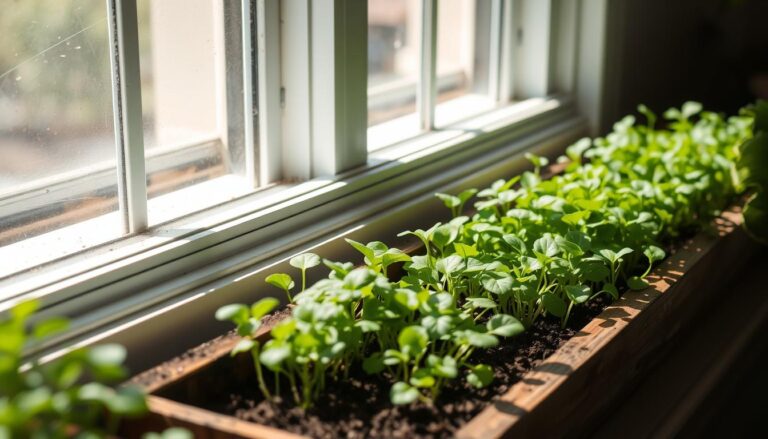
Getting Your Growing Space Ready
First things first – choose the right spot in your home. Here’s what to look for:
- A clean, flat surface away from direct cooking areas
- Good air flow (but not too windy)
- Easy access to water
- Temperature between 20-25°C (normal room temperature is perfect)
Pro tip: Kitchen countertop or balcony table works great. Just make sure your family knows not to disturb the trays!
Setting Up Your Containers
Before you start growing:
- Clean your trays properly with normal water
- Make drainage holes if needed (about 1 cm apart)
- Put the tray with holes inside the solid tray
- Wash your hands – clean setup means healthy plants
Preparing the Soil
This step is super important for good growth:
- Take your growing medium in a big bowl
- Add water slowly and mix well
- It should feel like a squeezed sponge – wet but not dripping
- Fill your tray about 1.5 inches deep
- Pat it down gently – not too tight, not too loose
Quick tip: If you’re using coco peat, soak it in water for 15-20 minutes before using.
Sowing the Seeds
Here’s the proper way to sow seeds:
- Level the soil surface nicely
- Spread seeds evenly (they should almost touch each other)
- Don’t throw all seeds in one spot
- Gently press them into the soil with a flat board
- Cover the tray with newspaper or another tray
Many beginners use too few seeds. For one standard tray (10×20 inches), use:
- Small seeds (like mustard): 2-3 tablespoons
- Medium seeds (like radish): 3-4 tablespoons
- Large seeds (like peas): 1 cup
Watering Your Plants
Watering is tricky – too much or too little can spoil your crop. Here’s what works:
First 3-4 days (when covered):
- Bottom water only
- Add water to the bottom tray
- Empty extra water after 10 minutes
- Keep soil moist but not swimming
After removing cover:
- Use spray bottle for top watering
- Water gently in morning and evening
- Don’t wet the leaves too much
- Check bottom tray isn’t full of water
Managing Light
Days 1-4:
- Keep trays covered (dark phase)
- Seeds don’t need light now
- Check daily for sprouts
Days 5 onwards:
- Remove cover when most seeds sprout
- Give indirect sunlight or grow light
- 12-14 hours of light daily is enough
- Rotate tray if plants lean towards light
Temperature and Humidity
Most homes in India have good temperature for microgreens. But here are some tips:
- Normal room temperature (20-25°C) is perfect
- If too hot, use a fan nearby
- If too cold, move away from AC
- Keep humidity around 50% (normal room humidity)
- Use regular water spray if air feels dry
Timeline: From Seed to Plate
Here’s what happens day by day:
- Days 1-2: Seeds swell up
- Days 3-4: Small white shoots appear
- Days 5-6: First leaves come out
- Days 7-10: Green leaves develop
- Days 10-14: Ready for harvest (depends on type)
Remember, different microgreens grow at different speeds. Radish might be ready in 7 days, while basil takes 14-21 days. The best way to know? Look at your plants! When they have their first set of true leaves and look fresh and green, they’re ready to eat.
Common Varieties and Their Growing Requirements
Let’s look at different microgreens you can grow at home. I’ve divided them into three groups based on how easy they are to grow. For beginners, it’s best to start with the easy ones and then try others once you get some experience.
Easy Varieties for Beginners
These are the most forgiving varieties – perfect for first-timers:
- Radish: Super quick and reliable. Ready in 5-7 days. Almost impossible to fail with these!
- Pea Shoots: Sweet taste, big seeds easy to handle. Takes 8-12 days.
- Sunflower: Everyone’s favorite, very crunchy. Ready in 8-12 days.
- Lettuce: Light and fresh taste. Takes 7-10 days.
- Arugula: Spicy kick, grows really fast in 5-7 days.
- Mustard: Nice spicy flavor, ready in 6-8 days.
- Cress: Small seeds but super easy, done in 5-7 days.
- Kale: Very nutritious, takes 8-12 days.
- Cabbage: Mild taste, ready in 7-10 days.
- Spinach: Familiar taste, grows in 8-12 days.
Success Rate: 90-95% for beginners Special Notes: These varieties grow well in normal room temperature and don’t need any special care.
Medium Difficulty Varieties
Try these after you’ve grown 2-3 batches of easy ones:
- Broccoli: Mild flavor, 10-14 days to grow.
- Amaranth: Beautiful red color, ready in 8-12 days.
- Basil: Amazing smell, needs 14-21 days.
- Cilantro: Indian favorite but bit tricky, takes 14-21 days.
- Swiss Chard: Colorful stems, grows in 10-12 days.
- Beet: Red stems, takes 12-15 days.
- Kohlrabi: Mild cabbage taste, 8-12 days.
- Mizuna: Japanese green, ready in 8-10 days.
- Tatsoi: Asian green, takes 10-14 days.
- Fennel: Nice anise flavor, needs 12-14 days.
Success Rate: 75-85% for average growers Special Notes: These need more attention to watering and temperature.
Advanced Varieties
For experienced growers who want a challenge:
- Carrot: Delicate leaves, takes 14-21 days.
- Celery: Strong flavor, needs 15-21 days.
- Chives: Slow growing, 21-30 days.
- Lemongrass: Needs warmth, takes 21-30 days.
- Parsley: Worth the wait, 21-30 days.
- Mint: Tricky but fragrant, 14-21 days.
- Sorrel: Tangy taste, 12-15 days.
- Shiso: Japanese herb, needs 14-21 days.
- Dill: Delicate seeds, takes 14-21 days.
- Chamomile: Tiny seeds, needs 14-21 days.
Success Rate: 60-70% even for experienced growers Special Notes: These varieties are picky about growing conditions.
Quick Comparison Table
| Difficulty Level | Growing Time | Success Rate | Water Needs | Common Problems |
| Easy | 5-12 days | 90-95% | Normal | Almost none |
| Medium | 8-21 days | 75-85% | Careful monitoring | Uneven growth |
| Advanced | 12-30 days | 60-70% | Very specific | Germination issues |
Pro Tips for All Levels
- Always start with easy varieties
- Don’t mix different seed types in one tray
- Faster-growing varieties need more water
- Slower ones need more patience
- Keep notes about what works for you
Remember, these success rates are just rough ideas. Even experts sometimes have failed batches. The key is to start simple and learn from each grow. Many beginners try advanced varieties too soon and get disappointed. Better to master the easy ones first!
Care and Maintenance
Growing microgreens is pretty easy, but they do need some daily attention. Don’t worry – it only takes about 10-15 minutes of your time each day. Here’s what you need to do to keep your microgreens healthy and happy.
Daily Routine
Morning:
- Check the soil moisture with your finger
- Water if needed (soil should feel like a squeezed sponge)
- Look for any yellow or brown spots
- Remove any seed husks that are stuck on leaves
Evening:
- Quick moisture check again
- Light watering if soil feels dry
- Remove any fallen leaves or debris
- Check air circulation (give trays a little space between them)
Watering Tips That Work
Most people either water too much or too little. Here’s what works best:
Morning watering:
- Use room temperature water
- Spray gently – don’t flood the tray
- Water until soil feels moist but not soggy
Evening watering:
- Light spraying only if needed
- Avoid getting leaves too wet before night
- Empty any standing water from bottom tray
Common Problems and Quick Fixes
Problem: Mold (white fuzzy stuff on soil)
- Fix: Reduce watering, improve air flow
- Use a small fan nearby
- Remove affected parts if you see any
Problem: Yellow leaves
- Usually means too much water
- Skip one watering session
- Make sure drainage holes aren’t blocked
Problem: Leggy plants (too tall and thin)
- Need more light
- Move tray closer to light source
- Don’t keep dark cover on too long
Problem: Uneven growth
- Seeds weren’t spread properly
- Next time, spread seeds more evenly
- Try using a shaker jar for small seeds
Keeping Pests Away
Actually, microgreens rarely get pest problems because they grow so fast. But still:
- Keep growing area clean
- Remove any dead plant material
- Don’t overwater
- Use clean water for spraying
- Keep pets away from growing trays
Preventing Diseases
The best way to prevent diseases is to:
- Start with clean trays
- Use fresh growing medium each time
- Keep good air circulation
- Don’t overcrowd seeds
- Remove any unhealthy-looking plants quickly
Most problems with microgreens happen because of too much water or poor air flow. Keep these two things right, and you’ll avoid 90% of common issues. Remember, it’s better to underwater than overwater – plants can recover from being a bit dry, but too much water often kills them!
Harvesting and Storage
This is the most exciting part – harvesting your microgreens! After all your care, it’s time to enjoy the results. Let’s see how to harvest and keep them fresh for as long as possible.
When to Harvest
The perfect time to harvest is when your microgreens:
- Have grown their first true leaves
- Are about 2-3 inches tall
- Look bright and healthy
- Stand up straight and strong
Don’t wait too long! Older microgreens get tough and lose their tender taste.
Harvesting Tips That Work
Here’s the best way to harvest:
- Use clean, sharp scissors (kitchen scissors work fine)
- Cut stems about 1/2 inch above soil level
- Don’t pull plants out – just cut them
- Harvest in the morning when plants are fresh
- Cut only what you need – they stay fresh longer on the plant
Cleaning and Storing Properly
Right after cutting:
- Gently wash in a bowl of clean water
- Pat dry with a clean kitchen towel
- Don’t rub hard – they’re delicate!
Storage options:
- Paper towel method: Wrap in slightly damp paper towel, put in box in fridge
- Box method: Line a box with paper towel, store in fridge
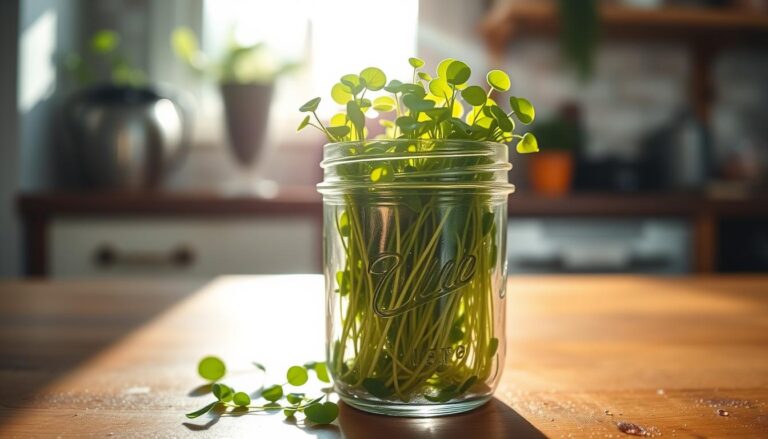
- Stems-in-water method: Put stems in water like flowers (good for pea shoots)
How Long They Last
In the fridge:
- Most varieties: 5-7 days
- Tougher ones (pea shoots, sunflower): 7-10 days
- Without proper storage: 2-3 days only
Fresh Storage Tips
To make them last longer:
- Never store wet microgreens
- Keep them in the main fridge compartment
- Check daily and remove any spoiled ones
- Don’t wash until ready to use
- Keep them away from very cold spots in fridge
Quick tip: If your microgreens start looking a bit tired, give them a quick ice water bath for 5 minutes. Works like magic to refresh them!
Using Your Microgreens
Now comes the fun part – eating your microgreens! These tiny plants can make any dish look fancy and taste amazing. Plus, they’re super healthy. Let’s see how to use them in everyday cooking.
Easy Ways to Use Microgreens
The best thing about microgreens is that you don’t need to cook them. Just add them fresh to your food:
- Top your sandwich or burger
- Mix into your morning omelet
- Sprinkle on pizza right after baking
- Add to your daily salad
- Garnish your soup or dal
- Mix into fresh chutneys
- Add to wraps and rolls
Simple Recipe Ideas
- Quick Microgreen Salad:
- Mix any microgreens
- Add sliced onions and tomatoes
- Squeeze some lemon juice
- Drizzle olive oil
- Add salt and pepper Done in 2 minutes!
- Microgreen Smoothie:
- Blend with fruits and yogurt
- Add handful of microgreens
- Perfect healthy breakfast
- Microgreen Chutney:
- Blend with mint and coriander
- Add your favorite microgreens
- Use like regular chutney
Health Benefits in Daily Diet
Adding microgreens to your daily food is super easy and healthy:
- Morning: Add to eggs or smoothies
- Lunch: Put in sandwiches or on dal-rice
- Evening snacks: Top your bhel or chaat
- Dinner: Garnish your curries or rotis
Remember: eating them fresh gives you the most health benefits!
Scaling Up Your Operation
Got good at growing microgreens? Thinking about making some money from it? Many people start selling microgreens after getting good results at home. Here’s how you can do it too.
Starting Small But Smart
First steps to turn your hobby into business:
- Start with 5-10 extra trays
- Try selling to friends and neighbors
- Make a simple business WhatsApp group
- Take orders one day before harvest
Space Planning
You don’t need a huge space to start:
- A 10×10 feet room can hold 30-40 trays
- Use rack systems to grow vertically
- Keep space for packing and cleaning
- Good ventilation is must for bigger setups
Smart Batch Planning
To have regular supply:
- Start new trays every 3-4 days
- Grow 2-3 popular varieties
- Keep track of what sells most
- Always have extra trays growing
Money Matters
Let’s look at basic costs and profits:
- One tray costs 50-60 rupees to grow
- Sells for 200-300 rupees
- Weekly profit from 10 trays: 1500-2000 rupees
- Monthly potential: 6000-8000 rupees
Pro tip: Start small, focus on quality, then grow slowly. Many people try to go too big too fast and face problems!
Troubleshooting Common Issues
Even experienced growers face problems sometimes. Don’t worry – most issues are easy to fix once you know what’s wrong. Here’s a simple guide to handle common problems.
Common Problems and Quick Solutions
Seeds Not Growing Well
When seeds don’t sprout properly, check these things:
- Old seeds? Use fresh ones next time
- Too deep in soil? Just press lightly on top
- Temperature too low? Move away from AC
- Dry soil? Keep moisture consistent
Quick Fix: For current batch, try removing cover for few hours and check moisture level.
White Fuzzy Stuff (Mold)
This is very common in humid weather:
- Remove affected parts immediately
- Put small fan for air flow
- Reduce watering for 1-2 days
- Keep some gap between trays
Quick Fix: Mix 1 spoon hydrogen peroxide in 1 cup water, spray lightly.
Tall, Thin Plants (Leggy Growth)
Plants stretching too much? Usually means:
- Not enough light
- Too much heat
- Seeds planted too close
- Cover left on too long
Quick Fix: Move to brighter spot, use small fan to strengthen stems.
Yellow or Weak Plants
Usually happens because:
- Too much water
- Poor drainage
- Not enough light
- Old growing medium
Quick Fix: Skip one watering, improve drainage, move to brighter spot.
Quick Solutions Table
| Problem | Causes | Quick Fix | Prevention |
| Poor Germination | Old seeds, wrong temp | Use heating pad, fresh seeds | Store seeds properly, check expiry |
| Mold Growth | High humidity, poor air flow | Use fan, reduce water | Better ventilation, proper spacing |
| Leggy Plants | Low light, too warm | More light, better air flow | Plan lighting before starting |
| Yellow Plants | Over/under watering | Fix watering schedule | Follow proper watering routine |
| Uneven Growth | Bad seed spacing | Can’t fix current batch | Use seed shaker next time |
Remember These Points:
- Most problems show up in first 3-4 days
- Better to prevent than try to fix
- Keep notes of what went wrong
- Learn from each failed batch
Pro tip: Take photos of problems you face. Helps in getting better advice from other growers, plus you’ll remember what worked and what didn’t!
Conclusion
Growing microgreens at home is easier than most people think. You don’t need fancy equipment or lots of space – just some basic supplies from your local shop and a little dedication. Start with easy varieties like radish or mustard, and you’ll have fresh, healthy greens in just a week.
Remember, everyone’s first batch might not be perfect, and that’s totally fine! Each time you grow, you’ll learn something new. The most important thing is to just start. Get your seeds and trays ready, follow the steps in this guide, and begin your microgreens journey.
Ready to start? Pick up some easy seeds like radish or mustard, grab a few trays, and give it a try. Your first homegrown microgreens are just a week away!
Additional Resources
Want to learn more about microgreens? Here are some great places to start your learning journey:
Online Communities
- Join “Microgreens India” group on Facebook
- Follow “Indian Microgreens Growers” on Instagram
- WhatsApp communities (search local gardening groups)
- YouTube channels with good growing tips in Hindi and English
Where to Buy Supplies
- Local nurseries for basic supplies
- Online marketplaces for seeds and equipment
- Garden supply shops in your city
- Weekend farmers’ markets for networking
Good Books to Read
- “Microgreens: The Insider’s Guide” – basic but very useful
- “Growing Microgreens Step by Step” – lots of pictures
- “Microgreens: Small Plants, Big Profits” – for business minds
Free Learning Resources
- Agriculture University websites
- Local gardening workshops
- Free YouTube tutorials
- Government agriculture department guides
Pro tip: Join some WhatsApp groups of local growers. They often share seeds and supplies, plus you get tips that work in your local weather conditions!