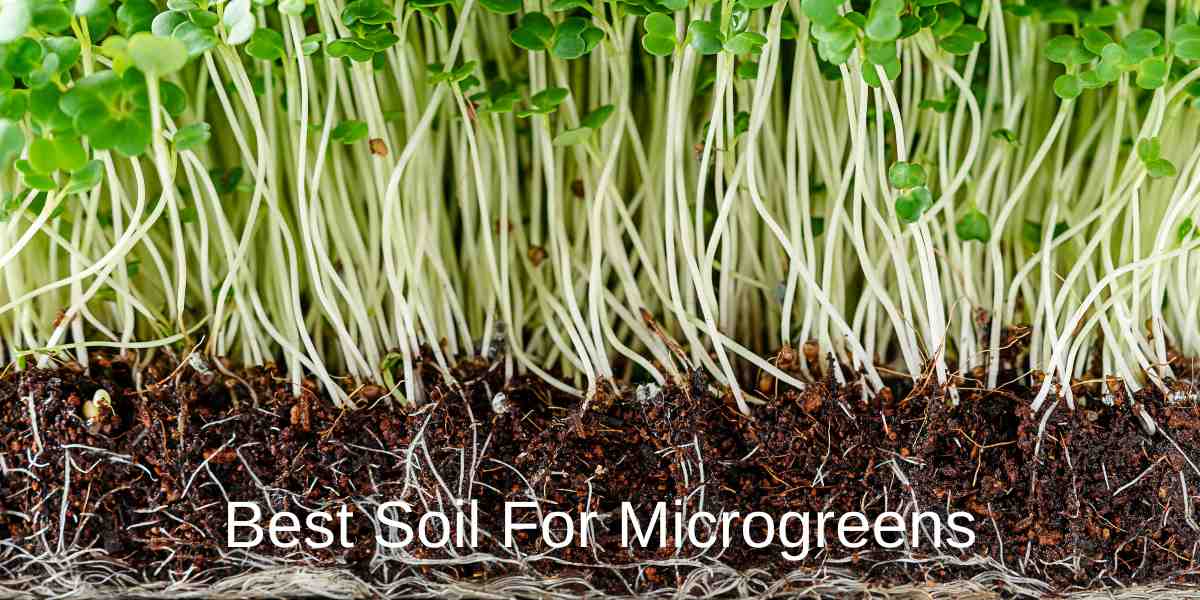
Best Soil for Microgreens: Simple Guide to Grow Healthy Greens
Introduction
More and more people are starting to grow microgreens at home these days. It’s easy to understand why – these small plants add such nice flavor to our food and are very good for health. But you know what? Many people who try growing microgreens make one big mistake. They don’t think much about what soil to use.
Just going to the shop and buying any soil won’t work well for microgreens. Trust me, I learned this the hard way when I first started growing them. We need to use the best soil for microgreens to grow well. After all, soil is like their home for those important first days of growing.
Through this guide, you will learn:
- What type of soil works best for growing microgreens
- How to mix your own soil at home
- Simple ways to avoid common problems
- How to save money while getting good results
When you use the right soil for microgreens, good things happen:
- Seeds start growing faster, usually in 2-3 days
- Plants develop strong roots
- Water stays in soil properly
- Plants don’t get spoiled by mold
- You get good harvest every time
I remember when I first started growing microgreens. I used normal garden soil and wondered why my plants weren’t growing well. But after learning about proper soil, everything changed. My microgreens started growing much better, and the same can happen for you.
Let’s start learning about soil for microgreens. Whether you’re just starting out or have been growing for some time, this guide will help you understand everything about choosing the best soil for your microgreens.
Understanding The Requirements Of Best Soil For Microgreens
When we talk about the best soil for microgreens, we need to understand what these small plants really need. Remember, microgreens only grow for 7-14 days, so they need very different soil from normal plants that grow for months.
What Makes Good Soil for Microgreens?
The best soil for microgreens should feel light when you pick it up. If you take a handful and squeeze it gently, it should break apart easily when you open your hand. This tells you the soil is just right – not too tight, not too loose.
Here’s what good microgreen soil needs to have:
- Small particles that hold together but don’t become hard
- Enough space between soil particles for air and water
- Clean material without any bad smell
- Good mixture of things that hold water and things that let water flow
Why Garden Soil Doesn’t Work Well
Many people try using normal garden soil because it’s free and easily available. But there’s a problem with this. Garden soil becomes very hard in small pots or trays. It’s like trying to grow plants in clay – roots can’t push through easily.
I tried using garden soil when I first started, and here’s what happened:
- The soil became like a brick after watering
- Seeds took very long to come up
- Many seeds didn’t grow at all
- The few plants that grew were very weak
The Important Parts of Good Microgreen Soil
Good microgreen soil is actually a mix of different things:
- Something light and fluffy (like cocopeat)
- Something for drainage (like small perlite stones)
- Something for food (like vermicompost)
- Clean soil or potting mix as base
Why Proper Water Flow is Very Important
One of the most important things about microgreen soil is how it handles water. The soil should be like a good sponge – it should:
- Hold enough water so plants don’t get thirsty
- Let extra water flow out easily
- Not become soggy or wet on top
- Keep some moisture even in hot weather
I learned that getting this water balance right makes a big difference. When soil holds water properly, seeds grow faster and plants become stronger. But if water doesn’t flow well, the soil becomes wet and plants can get sick very quickly.
Best Soil Types for Microgreens
Now that we know what makes good soil for microgreens, let’s look at different types of soil you can buy from shops. I’ve tried many types over the years, and I’ll share what works well and what’s worth your money.
Ready-Made Potting Mixes
Many companies sell special potting mixes that work well for microgreens. These mixes are easy to use because everything is already mixed properly. Here are some good options I’ve found:
- Regular Potting Mix
- Works quite well if you add some extra drainage material
- Usually costs less than special mixes
- Available in most garden shops
- Needs some adjustment for best results
- Special Microgreen Mix
- Made exactly for growing microgreens
- Costs more but gives very good results
- Not easily available in all places
- No need to add extra things
Organic vs Normal Soil
Many people ask about organic soil. Here’s what I learned:
Organic Soil:
- Made from natural materials
- Usually costs more
- Good if you want completely natural growing
- Sometimes has small sticks and pieces in it
Normal Soil:
- More processed and clean
- Costs less
- More consistent quality
- Easier to find in shops
Comparison of Different Soil Types
Here’s a simple comparison to help you choose:
| Soil Type | Cost per kg | Good Points | Not So Good Points | Best For |
| Basic Potting Mix | Rs. 30-40 | Cheap, easily available | Needs extra things added | Beginning growers |
| Coco Peat Based | Rs. 50-60 | Light weight, holds water well | Can dry out quickly | Small setups |
| Special Microgreen Mix | Rs. 80-100 | Perfect for microgreens | Expensive, hard to find | Professional growing |
| Organic Mix | Rs. 70-90 | All natural, good quality | More expensive, less consistent | Organic growing |
Money Saving Tips
Here’s how to save money while getting good soil:
- Buy basic potting mix and add your own extras
- Buy in bigger bags to get better rates
- Share cost with other growers and buy together
- Make your own mix (we’ll learn about this in next section)
What I Recommend
For people just starting out:
- Start with good quality basic potting mix
- Add some cocopeat for better water holding
- Mix in some perlite or sand for drainage
- Use this mix for first few grows
Once you get some experience, you can try special mixes or make your own. Remember, expensive soil doesn’t always mean better results. Many successful growers use simple mixes and get excellent microgreens.
5 Best Soil Mixes Available in the Market
1. Ugaoo Pot-O-Mix

2. TrustBasket Enriched Organic Earth Magic Potting Soil

3. Cocogarden Organic Potting Soil Mix

4. Casa De Amor Natural Potting Soil Mix

5. Bloom Buddy Enriched Organic Earth Magic Potting Garden Soil
No products found.
Creating Your Own Soil Mix
Making your own soil mix for microgreens is actually quite easy. After trying many different combinations, I found a simple mix that works really well. Let me share how you can make it at home.
What You Need to Buy
First, let’s get these basic things:
- Cocopeat (main ingredient)
- Vermicompost
- Perlite or coarse sand
- Basic potting soil
You can find these in most garden shops or online stores. If you can’t find perlite, don’t worry – coarse sand works just as well.
Simple Step-by-Step Mixing Guide
Here’s how to mix everything properly:
- First Day:
- Soak cocopeat in water (1 block usually needs 2-3 liters)
- Let it expand fully (takes about 2-3 hours)
- Break up any lumps with your hands
- Next Day:
- Take 3 parts of expanded cocopeat
- Add 2 parts basic potting soil
- Mix in 1 part vermicompost
- Add 1 part perlite or coarse sand
- Mix everything well with your hands
Perfect Ratios for Good Results
For making about 5 kg of mix:
- 3 kg expanded cocopeat
- 2 kg basic potting soil
- 1 kg vermicompost
- 1 kg perlite/sand
Money-Saving Alternatives
If you want to save money, try these options:
- Use coarse sand instead of perlite (works almost same)
- Make your own vermicompost at home
- Buy materials in bulk and store properly
- Share costs with other growers
Why Making Your Own Mix is Better
I’ve found many good reasons to make soil at home:
- Costs about 40% less than ready-made mixes
- You know exactly what’s in your soil
- Can adjust the mix based on your needs
- One-time buying of materials makes many batches
- Soil quality stays the same every time
Important Tips to Remember
After making many batches, I learned these things:
- Always mix in a clean, dry place
- Wear gloves while mixing
- Store extra materials in dry place
- Make small batch first to test
- Check if water flows properly through mix
The best part about making your own mix is that you can change it if something isn’t working well. Start with these measurements, and then adjust based on how your microgreens grow.
Common Soil Problems and Solutions
Sometimes things go wrong even when we try our best. Don’t worry – most soil problems have simple solutions. Let me share some common problems I’ve faced and how to fix them.
How to Know If Your Soil is Bad
Watch out for these signs:
- Seeds not growing even after 3-4 days
- Water staying on top of soil
- Bad smell coming from soil
- White or green stuff growing on top
- Plants looking weak and yellow
Dealing with Mold Problems
Mold is very common in microgreen growing. Here’s what to do:
- Remove affected parts immediately
- Reduce watering for some days
- Keep a small fan for air movement
- Try bottom watering instead of top
- Remove clear cover if you’re using one
When Water Doesn’t Flow Well
If water stays on top of soil:
- Mix in some more perlite or sand
- Make small holes in soil surface
- Don’t press soil too hard in tray
- Check if tray has enough holes
- Water from bottom instead of top
Making Soil Better for Plants
If plants look weak:
- Add one spoon vermicompost to each tray
- Check if soil is too tight or loose
- Make sure water flows properly
- Don’t use very old stored soil
- Mix soil properly before using
Fixing Growth Problems
When plants grow slowly or look unhealthy:
- Check soil moisture first
- Make sure soil isn’t too tight
- See if roots are growing well
- Try mixing new batch of soil
- Keep some gap between plants
Quick Tips from Experience
After growing many batches, I learned:
- Fresh soil works better than old stored soil
- Regular cleaning prevents most problems
- Keeping things clean is very important
- Simple fixes usually work best
- When in doubt, start fresh with new soil
Remember, most problems happen because of too much water or not enough air flow. Start with these simple solutions before trying anything complicated.
Soil Preparation and Maintenance
Getting your soil ready and taking care of it properly makes a big difference in how well microgreens grow. Let me share some simple ways to prepare and maintain your soil.
Getting Soil Ready for Planting
Before putting seeds, follow these steps:
- Break any big lumps in soil
- Remove any small stones or sticks
- Make soil surface level and smooth
- Press very lightly – just enough to make flat
- Spray some water to make slightly wet
How Deep Should Soil Be?
Different trays need different soil depth:
- Regular microgreen trays: 1.5 to 2 inches
- Small seedling trays: 1 inch is enough
- Deep trays: Don’t fill more than 2.5 inches
Too much or too little soil causes problems. I always use this simple trick – put soil up to my first finger joint, that’s usually the right depth.
Keeping Soil Moisture Right
This is very important for good growth:
- Check moisture every morning
- Soil should feel like a squeezed sponge
- Water only when top layer feels dry
- Don’t water if soil feels cold and wet
- Use spray bottle for gentle watering
When to Change Soil
Time to use fresh soil when:
- Old soil becomes very tight
- Bad smell comes from soil
- Plants growing very slowly
- Soil feels too dry even after watering
- After growing 2-3 batches in same soil
Storing Extra Soil
Keep your soil good for long time:
- Store in clean, dry bags
- Keep bags off ground
- Don’t store in direct sun
- Close bags properly after use
- Use within 3-4 months
Best Practices and Tips
After growing microgreens for many years, both small and large amounts, I’ve learned some useful tricks. These tips will save you time and help avoid common problems.
Smart Growing Tips
Save time and money with these ideas:
- Prepare soil one day before using
- Mix big batches and store extra properly
- Keep tools near growing area
- Write down what works well
- Check plants every morning
Things to Avoid
Many people make these mistakes:
- Using very old stored soil
- Pressing soil too hard in trays
- Watering too much at once
- Not cleaning trays between batches
- Mixing different types of seeds in same soil
Tips from Professional Growers
Some experienced growers shared these tips:
- Start with small batches first
- Keep extra soil mix ready always
- Clean everything before using
- Test new soil mix on small tray first
- Change soil completely after every 2-3 grows
Remember, good results come from doing simple things regularly rather than trying complicated methods.
Conclusion
Growing microgreens is not difficult when you use the right soil. Remember to keep soil light and well-draining, whether you buy ready-made mix or make your own. Start with a small tray, use fresh soil, and learn from each batch you grow.
Why not start your microgreen journey today? Good soil is waiting to grow your first batch of fresh, healthy microgreens!
Last update on 2025-04-14 / Affiliate links / Images from Amazon Product Advertising API