How to Grow Wheatgrass Microgreens: From Seeds to Juice in Just 10 Days
Introduction
Hey guys! Today I want to tell you about growing wheatgrass microgreens at home. You know how those juice shops charge 100-150 rupees for one small shot of wheatgrass juice? It’s crazy expensive! But don’t worry – I found a much better way.
So last month I started growing wheatgrass microgreens in my kitchen. Trust me, it’s not hard at all. You don’t need any special training or big space. Just get some wheat seeds from the shop, and you can start growing them at home.
The best thing? It only takes 8-10 days to grow. Yes, just 8-10 days! You put the seeds in soil, water them, and before you know it, you’ll have fresh wheatgrass ready for your morning juice. No need to spend big money at juice shops anymore.
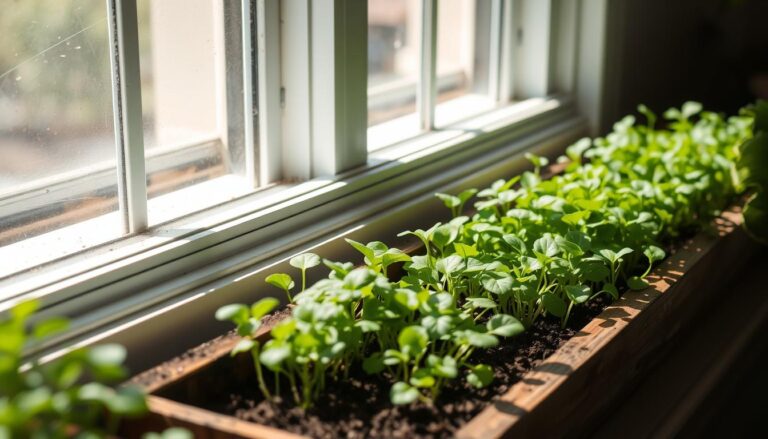
I was also worried at first about growing them at home. But after trying it once, I realized it’s actually very simple. You can grow them in any small container on your kitchen counter. Now I always have fresh wheatgrass for my morning juice, and I know it’s completely clean and healthy because I grew it myself.
So if you want to save money and have fresh wheatgrass every day, just follow this guide. I’ll show you exactly how I do it in my small kitchen. It’s really not complicated – if I can do it, you definitely can too!
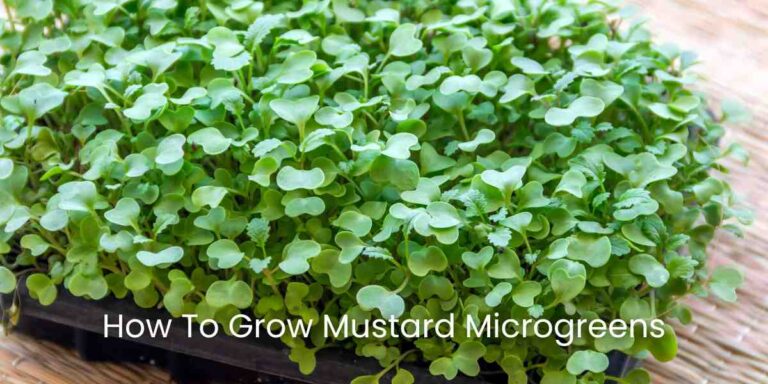
Understanding Wheatgrass Microgreens
Let me explain what exactly wheatgrass microgreens are. They are basically baby wheat plants that we harvest when they’re just 8-10 days old. At this young age, these small plants are super nutritious – much more than regular wheat grass or wheat plants.
Speaking of nutrition, wheatgrass microgreens are packed with good stuff. They have lots of vitamins A, C, and E, plus important minerals like iron and calcium. Many people say one small shot of wheatgrass juice is equal to eating a whole plate of regular vegetables! While growing these at home, I noticed they have a fresh, sweet grass smell and taste quite mild compared to mature wheatgrass.
About the growing timeline – it’s quite simple to remember:
Day 1-2: Seeds soaking
Day 2-3: Seeds start sprouting
Day 4-5: First shoots appear
Day 6-8: Green leaves develop
Day 8-10: Ready for harvest
Now, let’s talk about how much you can grow. From my experience, one regular kitchen tray (about 10×20 inches) gives enough wheatgrass for 10-12 shots of juice. From 100 grams of seeds, you can expect about 400-500 grams of fresh wheatgrass. This is enough for one person’s weekly supply of daily shots.
The best part? You can start a new tray every week, so you’ll always have fresh wheatgrass ready when you need it. Many of my friends started with one small tray and now grow 2-3 trays in rotation for their family.
Required Materials and Setup
First, let’s talk about what you need to start growing wheatgrass microgreens. Don’t worry – you can find most of these things easily at your local garden shop or kitchen store.
For seeds, you need good quality wheat seeds. Don’t use the regular atta wheat – it won’t work well. Go to any garden shop and ask for wheat grass seeds or wheat berries. Make sure the seeds look clean and uniform in size. One packet of 100 grams is good to start with.
For containers, you have many options. You can use:
- Plastic growing trays from garden shops
- Old plastic takeaway containers (just make holes at the bottom)
- Those flat plastic containers that come with mushrooms
- Even an old steel plate with small holes works fine!
The growing medium is very important. Here are your options:
- Coco peat (easily available and works great)
- Regular garden soil mixed with vermi compost
- Just plain soil from your garden (but mix it with some sand)
You’ll also need these basic things:
- A spray bottle for watering
- A tray to catch water
- Some old newspaper
- A scissors for harvesting
- A small hand shovel or old spoon
For the basic setup, you need:
- A space near a window that gets morning sunlight
- A small table or counter space
- Room temperature between 20-30°C (normal room temperature is fine)
- A place to drain excess water
One good tip – keep all these things together in one place. I use an old cardboard box to store everything except the soil. Makes it much easier to find stuff when you need it. Total cost for everything should be around 500-700 rupees, and most things will last for many grows.
Step-by-Step Growing Process
Now I’ll tell you exactly how to grow your wheatgrass microgreens step by step. I’ve grown many batches now, and this method works really well.
Seed Preparation (Day 1): Take your wheat seeds and wash them properly in normal tap water. Remove any floating seeds – they’re not good. Now put the seeds in a bowl and add water until it covers them completely. Keep them soaking for 8-12 hours. I usually do this in the morning before going to work, so they’re ready by evening.
Preparing the Growing Medium (While Seeds Are Soaking): If you’re using coco peat, put it in a bucket and add water slowly. Mix it well until it feels like a squeezed-out wet sponge. Not too wet, not too dry. For regular soil, just make sure there are no big lumps or stones. Fill your growing tray with about 1.5 inches of the growing medium and pat it down lightly.
Sowing the Seeds (After 8-12 Hours): Drain the soaked seeds and rinse them once. Spread them evenly on your prepared tray – they should be close but not piled on top of each other. Don’t worry about making perfect rows. Just make sure they’re spread out nicely. One handful of seeds usually covers about 6×6 inches of space.
Watering Technique: This is very important! Never pour water directly on the seeds. Use a spray bottle and mist them gently. The soil should feel moist but not swimming in water. Water twice daily – morning and evening is best. If you touch the soil and your finger comes out dirty wet, it’s too much water.
Blackout Period (Days 2-5): After sowing, cover the tray with another tray or newspaper. Keep it in a dark place for 3-4 days. During this time, just lift the cover to spray water twice daily. You’ll see the seeds sprouting – they look like small white shoots. This is normal!
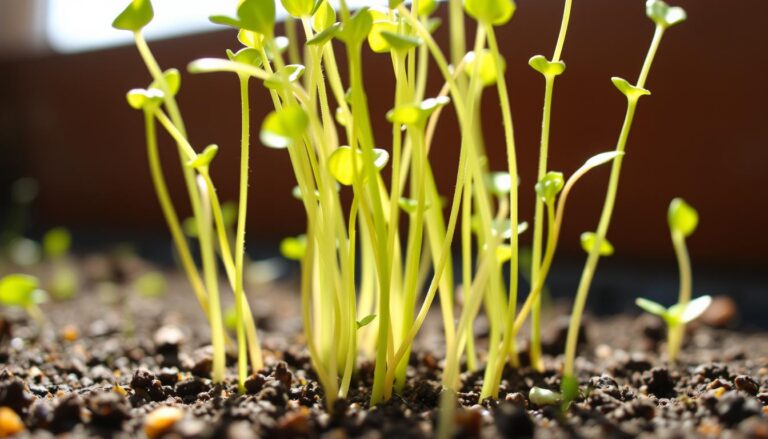
Light Exposure (Days 5-8): After 3-4 days, when you see lots of yellow shoots, remove the cover. Put the tray near a window where it gets morning sunlight. Don’t put it in strong afternoon sun – it’s too hot! Within 1-2 days, you’ll see the shoots turning green. This is very exciting to watch!
Daily Care Routine: Morning:
- Check the soil moisture
- Spray water if needed
- Make sure there’s some airflow around the tray
Evening:
- Another moisture check
- Light spray of water if needed
- Remove any yellow or brown leaves if you see any
Quick Tips for Success:
- If you see water collecting in the bottom tray, empty it
- Don’t let the soil dry out completely
- Keep the room temperature normal – no AC directly on the plants
- If the shoots look crowded, that’s okay – they support each other
- Use filtered water if your tap water is very hard
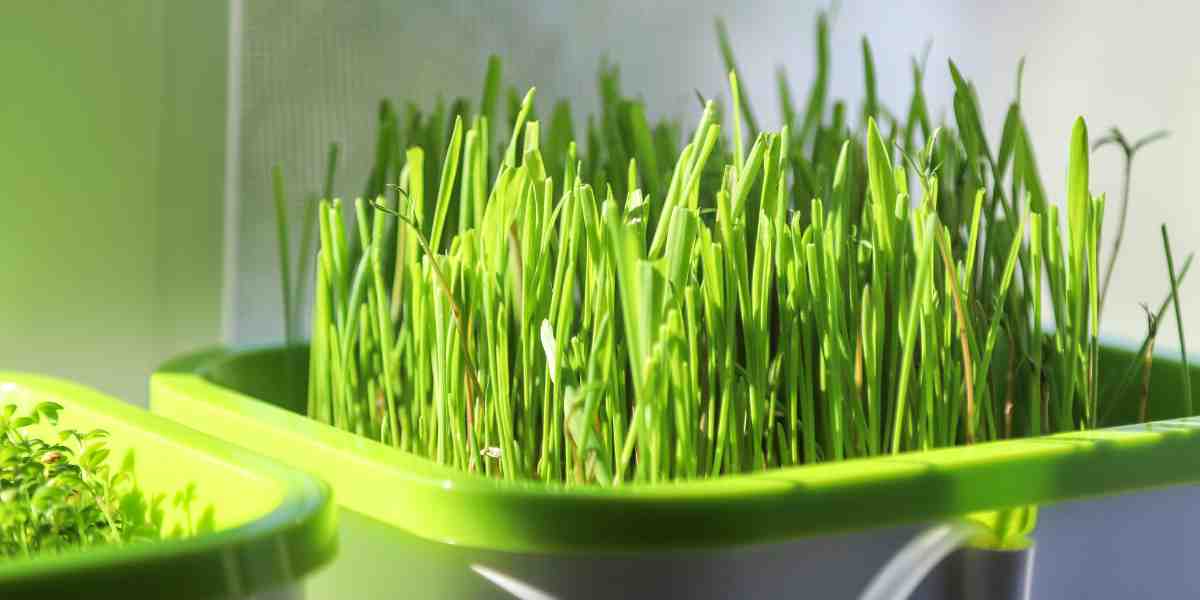
By day 8-10, your wheatgrass should be about 6-7 inches tall and bright green in color. That’s when you know it’s ready for harvest! Remember, every batch might grow slightly differently depending on the weather and season, but this basic process always works.
Common Problems and Solutions
Let me tell you about some common problems you might face while growing wheatgrass microgreens, and how to fix them. I’ve faced most of these issues myself, so I know exactly what works and what doesn’t.
Mold Problems:
Sometimes you might see white fuzzy stuff growing on your soil or seeds. Don’t panic!
This happens when:
- The seeds are too close together
- There’s too much water
- Not enough air movement
Quick fixes:
- Use a small fan for air circulation
- Water less frequently
- Remove any clumped seeds right after sowing
Yellow Leaves Issue:
If your wheatgrass looks yellow instead of bright green, it’s usually because:
- Too much time in the dark
- Not enough light after the blackout period
- Seeds planted too deep in soil
How to fix:
- Remove the cover as soon as shoots are 2-3 inches tall
- Keep the tray near a window with morning light
- Don’t bury the seeds in soil, just spread them on top
Watering Problems:
This is very common in our humid climate. Watch out for:
- Soil staying wet for too long
- Water pooling in the bottom tray
- Dry patches in some areas
Solutions:
- Empty the bottom tray after watering
- Use a spray bottle instead of pouring water
- Water only when the top soil feels dry to touch
Temperature Issues:
In India, we face both heat and cold problems:
Summer problems:
- Seeds sprouting too fast
- Soil drying quickly
- Weak, thin shoots
Winter problems:
- Slow growth
- More chances of mold
- Seeds taking longer to sprout
Solutions:
- Summer: Keep away from AC, use slightly more water
- Winter: Use room temperature water, keep in warmer spot
Big Mistakes to Avoid:
- Using normal wheat flour wheat – always use proper wheat grass seeds
- Overwatering because you’re worried about dry soil
- Keeping in strong afternoon sunlight
- Not cleaning your trays between batches
- Using very cold water for spraying
Remember, even if your first batch isn’t perfect, don’t worry! Each time you grow, you’ll learn something new. Just follow these tips and you’ll get better results every time.
Harvesting and Storage
Now comes the exciting part – harvesting your wheatgrass microgreens! After all your hard work, you’ll want to do this properly to get the most from your crop.
When to Harvest: Your wheatgrass is ready for harvesting when:
- It’s about 6-7 inches tall
- The color is bright green
- You see a small split at the top of each blade
- Usually around day 8-10
This is the best time because the nutrients are at their peak. Don’t wait too long, or the grass will start getting tough.
Harvesting Tools and Method: You only need two things:
- A clean pair of scissors (kitchen scissors work fine)
- A clean plate or container
How to harvest:
- Take your clean scissors
- Hold a bunch of grass gently
- Cut about 1/2 inch above the soil
- Don’t pull the grass – always cut it
- Cut only what you’ll use that day
Storage Tips: Fresh is best, but if you need to store:
- Wrap in slightly damp paper towel
- Put in a plastic box with holes
- Keep in fridge (not in freezer!)
- Use the middle shelf of your fridge
- Don’t wash before storing
Shelf Life:
- Fresh cut: Best to use within 2-3 hours
- In fridge: Stays good for a week and even longer if stored well.
- Once juiced: Drink immediately for best benefits
Pro Tips:
- Cut just before making juice
- Clean your scissors after each use
- Don’t store cut grass in water
- If it turns yellow in fridge, time to use it or throw it
- You can start a new batch while harvesting the current one
After harvesting, throw the used soil in your garden – it’s good manure! Clean your tray well with hot water before starting your next batch.
Tips for Maximum Yield
Let me share some special tips to get the most out of your wheatgrass microgreens. After growing many batches, I’ve figured out what really works best in our climate.
Temperature Tips: Keep your growing area between 25-30°C. In summer, early morning or evening is best for watering. In winter, keep trays away from cold windows at night.
Humidity Control: Our weather is already quite humid, so don’t worry too much. Just keep a small fan running nearby for good air flow. In very dry weather, keep a small water bowl near the tray.
Light Setting: Morning sunlight works best – around 4-5 hours is perfect. Keep trays near an east-facing window if possible. If using artificial light, regular white LED bulbs work fine for 12 hours daily.
Spacing Guide: For one regular tray:
- Use about 100g seeds
- Spread them just touching each other
- Leave 1-inch gap near tray edges
- Don’t overcrowd – seeds need some breathing space
Remember, happy plants give better yields. Check your trays daily – healthy wheatgrass has a sweet grass smell and stands straight and tall.
Conclusion
See, growing wheatgrass microgreens at home isn’t tough at all! Just remember the basics – good seeds, clean trays, proper watering, and some patience. In just 8-10 days, you’ll have your own fresh wheatgrass ready for juicing.