12 Easiest Microgreens to Grow at Home
Introduction
Growing fresh greens at home is becoming very popular these days. Many people living in cities are trying it, and the easiest way to start is with microgreens. These small plants might look tiny, but they give a lot of good nutrients and make food taste better.
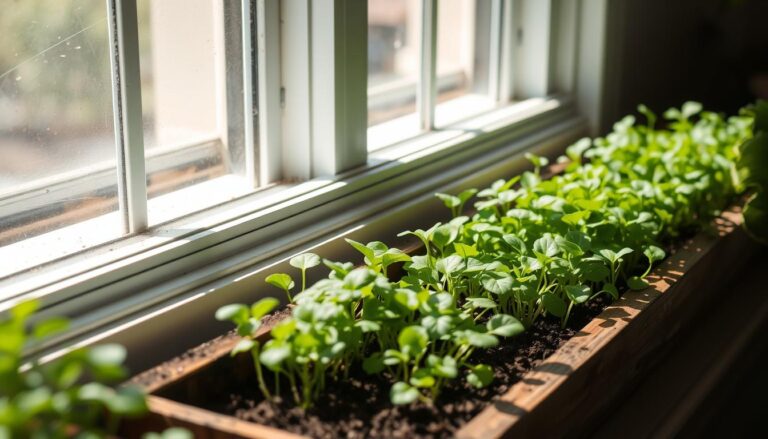
A lot of people think growing microgreens at home is very hard. They worry about not having garden space or proper equipment. But actually, anyone can grow these small plants easily. All you need is some containers, good seeds, and a sunny window. Even if you stay in a small flat, you can grow fresh microgreens in your kitchen.
These small plants grow very fast. Some types are ready to eat in just 7-10 days. Compare this to normal vegetables that take months to grow! Plus, these tiny greens have more vitamins than big vegetables. When you grow them at home, you can add fresh microgreens to your food every day without spending much money.
In this guide, we will tell you about 12 types of easiest microgreens to Grow at home. You will learn which ones grow fastest, what simple things you need to start, and how to take care of them properly. Most things needed for growing are already there in most homes. No need to buy expensive equipment.
Want to start growing your own fresh microgreens? Let’s learn how to do it step by step.
What Are Microgreens?
Microgreens are young vegetable greens that we harvest when they are very small. Think of them as baby plants that are bigger than sprouts but smaller than baby greens. These tiny plants are usually 1-3 inches tall and have their first set of true leaves when we cut them for eating.
Many people get confused between sprouts, microgreens, and baby greens. Here is a simple way to understand the difference:
Sprouts vs Microgreens vs Baby Greens:
- Sprouts are youngest (3-5 days old), grown in water, and we eat whole plant with roots
- Microgreens are medium age (7-14 days old), grown in soil or mats, and we cut them above the soil
- Baby greens are oldest (21-28 days old), grown in soil, and look like small versions of adult plants
The best thing about microgreens is their nutrition. These tiny plants are very powerful! Research shows they have 4-40 times more vitamins and good nutrients than their big versions. For example, red cabbage microgreens have 40 times more vitamin E than fully grown cabbage. Even a small amount of microgreens can make your food much more healthy.
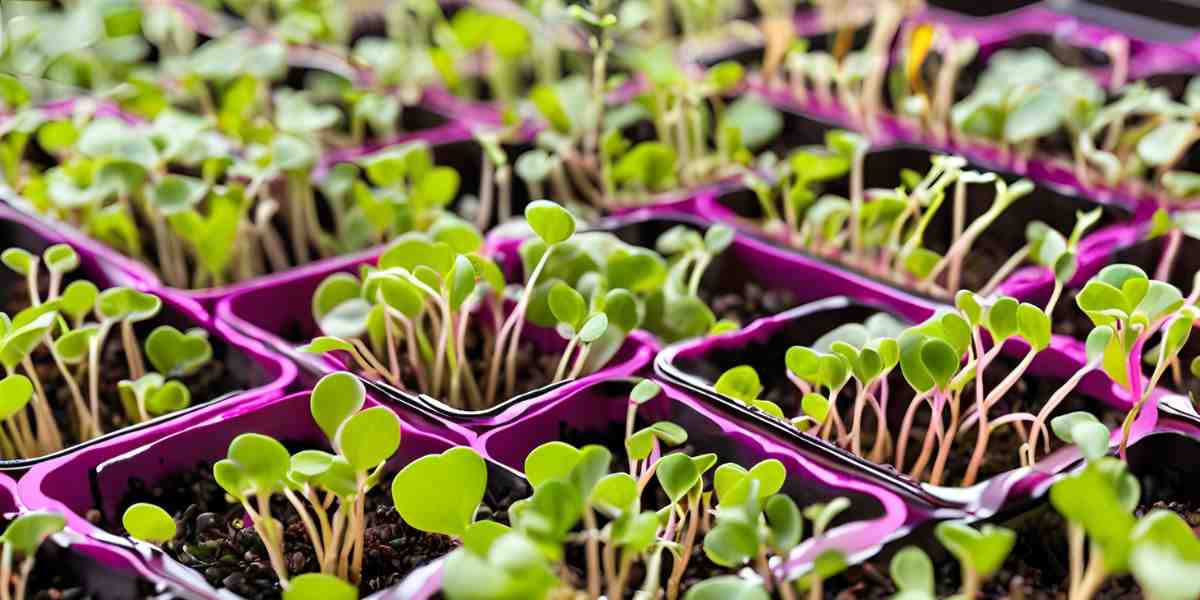
Plus, microgreens come in many nice colors like green, purple, and red. They make normal food look special and give extra fresh taste. That’s why many restaurants use them to make their dishes look pretty.
Why Grow Microgreens at Home?
Growing microgreens at home is becoming very popular these days, and for good reasons. Let’s see why more and more people are starting to grow these small plants in their homes:
Save Money
Microgreens in shops and markets are very expensive. A small box can cost 100-200 rupees! But when you grow at home, one packet of seeds (costing 50-100 rupees) can give you many harvests. This means you spend less money and get more fresh greens.
Good for Health
When you grow at home, you know exactly how your food is grown. No chemicals or artificial things are used. Plus, you can cut and eat microgreens fresh from the plant. This means you get all the good nutrients. Fresh microgreens have more vitamins and minerals than those kept in shops for many days.
Grow All Year
Unlike normal kitchen gardens that work well only in some seasons, you can grow microgreens any time of the year. They grow inside the house, so weather outside doesn’t matter much. Even in summer or rainy season, your microgreens will grow well near a window.
Perfect for Small Homes
Look at these numbers:
- A 2 feet windowsill can grow enough microgreens for 2-3 people
- Small flat balcony can give greens for whole family
- One tray (10×20 inches) gives 100-200 grams of microgreens
Many people think they need big space for growing food. But microgreens grow well in small spaces. You can grow them:
- On kitchen counter
- Near windows
- In balcony corner
- Even on dining table
Plus, they grow so fast that you don’t need to wait long to see results. Most types are ready to eat in 7-14 days. This quick growing makes them perfect for busy people who want to try growing something at home.
12 Easiest Microgreens To Grow for Beginners
Let’s look at 12 types of easiest microgreens to grow at home. These plants grow quickly and don’t need much special care. Even if you never grew anything before, you can start with these:
Here’s a quick look at how fast these microgreens grow:
| Microgreen Type | Days to Harvest | Difficulty Level | Light Needs |
| Radish | 5-7 days | Very Easy | Medium |
| Pea Shoots | 7-10 days | Very Easy | Low |
| Sunflower | 8-12 days | Easy | Medium |
| Broccoli | 7-10 days | Very Easy | Medium |
| Mustard | 6-8 days | Easy | Medium |
| Arugula | 5-7 days | Very Easy | Medium |
| Basil | 12-15 days | Medium | High |
| Coriander | 12-15 days | Medium | Medium |
| Amaranth | 8-12 days | Easy | Medium |
| Kale | 8-12 days | Easy | Medium |
| Cabbage | 7-10 days | Very Easy | Medium |
| Lettuce | 7-10 days | Easy | Low |
1. Radish Microgreens: These are perfect for beginners because they grow very fast. Radish microgreens have a spicy, fresh taste that makes salads more interesting. They grow in just 5-7 days and don’t need much light. You can add them to sandwiches, salads, and any dish that needs a spicy kick. They have beautiful green leaves and grow well even if you make small mistakes.
2. Pea Shoots: Pea shoots are like eating sweet fresh peas but in leaf form. They grow well in less light and are ready in 7-10 days. The best thing about pea shoots is they taste sweet and have a nice crunch. They grow quite tall compared to other microgreens and give good amount of leaves. Perfect for stir-fry dishes and salads.
3. Sunflower Microgreens: These are very popular because they have big, crunchy leaves with a nutty taste. They need 8-12 days to grow and give lots of greens from few seeds. Sunflower microgreens are filling and taste like fresh sunflower seeds. They’re perfect for sandwiches and can even be eaten alone as a healthy snack.
4. Broccoli Microgreens: Broccoli microgreens grow very easily and are full of good nutrients. They take 7-10 days to grow and have a mild, cabbage-like taste. These small plants have more good nutrients than big broccoli! They grow well in normal room temperature and are perfect for adding to morning eggs or smoothies.
5. Mustard Microgreens: If you like spicy food, try growing mustard microgreens. They grow in 6-8 days and add nice spicy flavor to any dish. The leaves can be green or purple depending on which type you grow. They’re perfect for adding to sandwiches and salads when you want extra spicy taste.
6. Arugula Microgreens: These grow very fast, just 5-7 days! Arugula microgreens have a peppery taste that many people love. They need very little care and grow well in small spaces. Use them in salads, on top of pizza, or in sandwiches for extra flavor.
7. Basil Microgreens: Basil takes little longer (12-15 days) but gives very nice aroma. They need more sunlight than other microgreens but are worth waiting for. The leaves smell amazing and can make any Italian dish taste better. They also work well in fresh juice and salads.
8. Coriander Microgreens: These take 12-15 days to grow but taste just like fresh coriander. They need medium light and regular watering. The best part is you get coriander taste faster than growing big plants. Perfect for garnishing any Indian dish or adding to chutneys.
9. Amaranth Microgreens: Amaranth grows in 8-12 days and can have beautiful red or green colors. They don’t need much care and grow well in warm weather. These microgreens look very pretty and make food look special. They have a mild, earthy taste and go well with most dishes.
10. Kale Microgreens: Kale microgreens are full of nutrients and grow in 8-12 days. They have a mild, fresh taste that’s not bitter like big kale. They grow well in normal room temperature and don’t need special care. Perfect for adding to smoothies or morning eggs for extra nutrition.
11. Cabbage Microgreens: These are very easy to grow and ready in 7-10 days. Cabbage microgreens have a mild, sweet taste and can be green or purple. They grow well even if you make small mistakes in care. Use them in salads, sandwiches, or as garnish for soups.
12. Lettuce Microgreens: Lettuce is easy to grow and takes 7-10 days to harvest. These microgreens have a very mild, fresh taste and are perfect for beginners. They don’t need much light and grow well in most places. Add them to any dish where you want extra greens without strong flavor.
Growing Guide
Growing microgreens is not difficult if you follow some basic steps. Here is a simple guide that anyone can follow:
Things You Need:
- Flat container with drainage holes
- Small plate to keep under container
- Good quality seeds
- Potting soil or coco peat
- Water spray bottle
- Clean scissors
Step-by-Step Growing Process
- Prepare Container
- Clean container properly with soap water
- Make sure drainage holes are not blocked
- Keep plate under container to catch water
- Add Growing Medium
- Fill container with soil or coco peat (2 inches deep)
- Press lightly to make surface flat
- Spray water to make soil slightly wet
- Plant Seeds
- Spread seeds evenly on soil
- Don’t put too many seeds in one place
- Press seeds gently into soil
- Cover with very thin layer of soil
Water Care Tips (know more details about watering)
- First 3-4 days: Spray water 2 times daily
- After plants come up: Water once daily
- Always check soil before watering
- Water should not stay in bottom plate
- Morning time is best for watering
(know more details about watering.)
Light Requirements
- Keep tray in bright place but not in direct sun
- 4-6 hours of light daily is enough
- Normal room light works well
- Rotate tray if plants bend towards light
- Use normal white LED light if window light is less (Check this to learn growing without grow lights)
Daily Care
- Check soil wetness every morning
- Remove any yellow or dead leaves
- Keep air moving around plants
- Don’t let water stay in bottom plate
- Look for any mould growing on soil
Remember: Different microgreens need slightly different care, but these basic steps work well for all types mentioned in our list. Start with easy ones like radish or pea shoots to learn the process.
Common Problems and Solutions
Even careful growers sometimes face problems with microgreens. Here are common issues and easy ways to solve them:
Problem 1: White Fuzzy Mould on Soil
What causes it:
- Too much water
- Poor air flow
- Seeds too close together
Quick fixes:
- Reduce watering
- Use small fan for air movement
- Next time spread seeds with more space
Problem 2: Long, Thin Plants Falling Over
This happens when:
- Not enough light
- Plants stretching to find light
- Too much water
How to fix:
- Move tray closer to window
- Use normal white LED light
- Water less frequently
Problem 3: Seeds Not Growing Well
Main reasons:
- Old or poor quality seeds
- Soil too wet or dry
- Wrong temperature
Solutions:
- Buy fresh seeds from good shop
- Keep soil just moist, not wet
- Maintain room temperature (20-25°C)
Remember: Prevention is better than cure. Good air flow, proper watering, and enough light will stop most problems before they start.
Harvesting and Storage
When to Harvest Harvest your microgreens when they are 2-3 inches tall and have their first true leaves. Most types are ready in 7-14 days. Morning time is best for cutting because plants are fresh and crisp.
How to Cut Properly
- Take clean, sharp scissors
- Hold small bunch of microgreens gently
- Cut stems just above soil level
- Don’t pull plants from soil
- Keep cut microgreens in clean bowl
Keeping Them Fresh
Different storage methods work for different times:
For 4-5 Days:
- Put kitchen paper in box
- Keep cut microgreens on paper
- Close box loosely
- Store in fridge
- Don’t wash before storing
For 1-2 Days:
- Put stems in small water glass
- Cover leaves loosely with plastic
- Keep in fridge
- Change water daily
Remember: Microgreens taste best when fresh. Try to cut only what you need for 2-3 days. If properly stored in fridge, most types stay good for 4-5 days, but their nutrition value slowly goes down.
Conclusion
Growing microgreens at home is easier than most people think. You don’t need special equipment or big space – just some basic things from home and a sunny window. Start with easy types like radish or pea shoots, and soon you’ll be growing fresh, healthy greens for your family.
Even if you make some mistakes in the beginning, don’t worry. These small plants are quite strong and grow back quickly. The best way to learn is by starting small and trying different types as you get more confident.
FAQs
Q1: Do microgreens grow back after cutting?
No, microgreens don’t grow back after cutting. You need to plant new seeds. But don’t worry – they grow so fast that you can start a new batch every week for continuous supply.
Q2: Can I grow microgreens without soil?
Yes, you can grow them on special growing mats or paper towels. But for beginners, soil or coco peat is easier because it holds water better and gives more nutrients to plants.
Q3: How much water do microgreens need daily?
They need water 1-2 times daily in the beginning. After plants come up, check soil with finger – if it feels dry, spray some water. Don’t keep soil too wet as this can cause mould.
Q4: Which microgreens grow fastest?
Radish, arugula, and mustard microgreens are fastest, ready in 5-7 days. If you’re just starting, try these types first to see quick results.
Q5: What if I see some white stuff growing on soil?
White fuzzy growth is usually mould. Reduce watering, increase air flow with small fan, and remove affected parts. Next time, don’t put seeds too close together and water less.